Madden Defensive Coverages Explained: Cover 2, Cover 3, Man and Blitzes
Learn how man and zone coverage work in Madden, what Cover 0 through Cover 4 and Tampa 2 mean, how to read zone colors and when to blitz or adjust.
Defense is where many Madden players feel lost. Offense gives you a clear goal: pick a play, throw to the open man. Defense asks you to predict what the other side will do, choose a coverage that takes it away, and then control a single defender while ten others follow their assignments. The good news is that Madden’s defensive playbook is built on real football concepts that have clear strengths and weaknesses. Once you understand a handful of coverage shells and how they appear on the play-call screen, defense becomes a chess match instead of a guessing game.
Man vs. Zone: The Foundation
Every pass coverage in Madden falls into one of two families, or a blend of them.
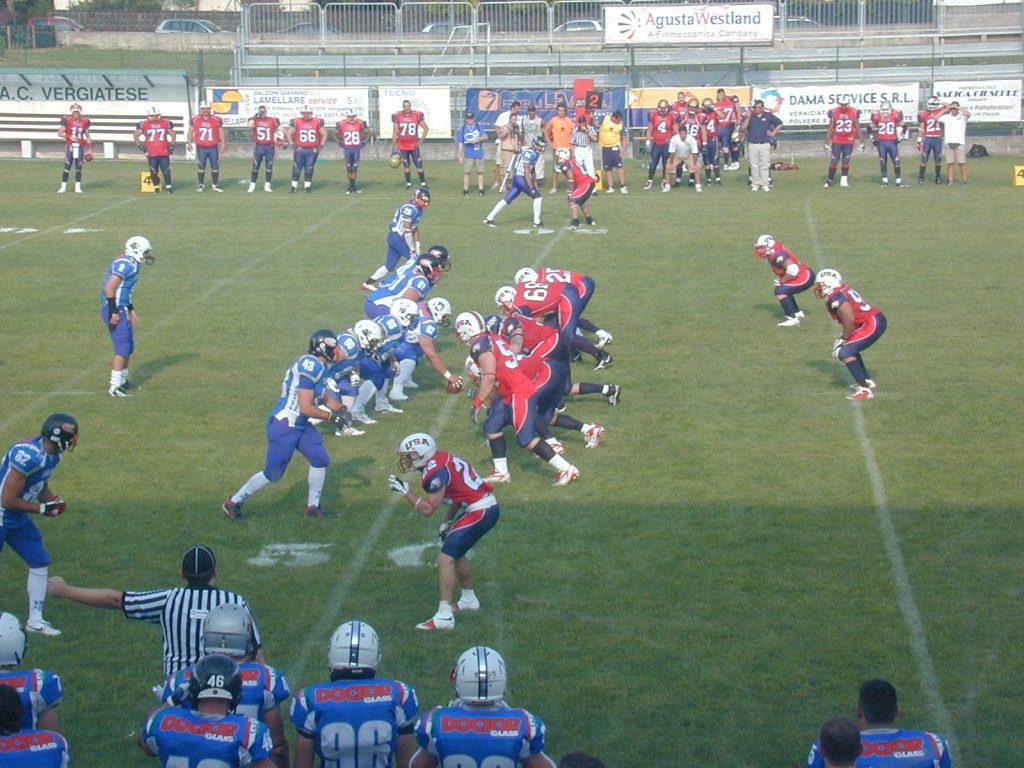
- Man coverage. Each defender is assigned a specific eligible receiver and follows him wherever he goes. Man is aggressive and tight but vulnerable to receivers who win their individual matchup, especially with routes that cross the field.
- Zone coverage. Each defender is responsible for an area of the field instead of a player. Zone keeps eyes on the quarterback and helps against crossing routes, but it leaves soft spots between zones that smart offenses attack.
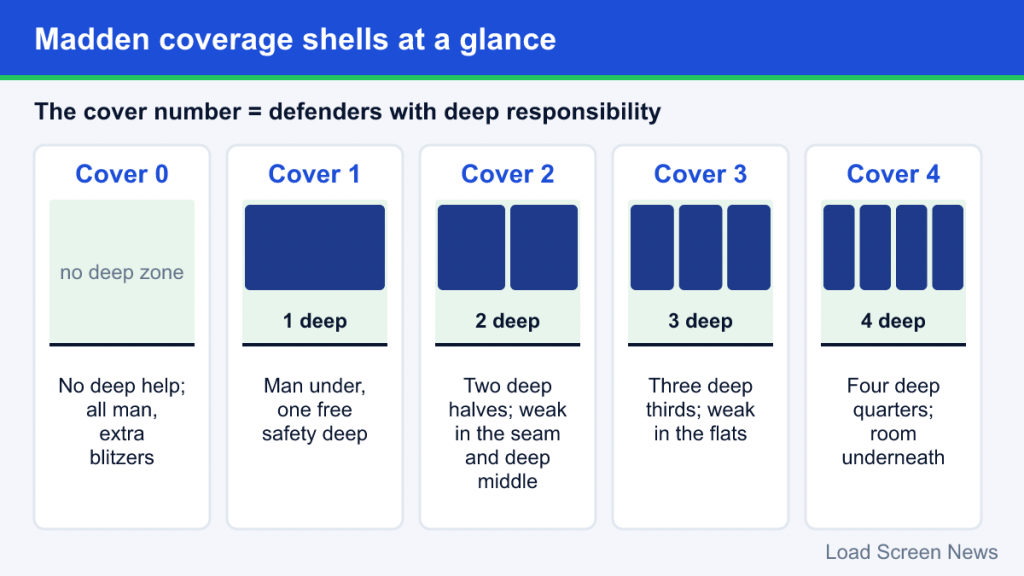
In football terminology, the “cover” number generally describes how many defenders have deep responsibility. Shells can pair deep zones with either man or zone coverage underneath, which is why you will see names like “Cover 2 Man” in Madden’s playbooks.
The Coverage Shells
Cover 0
Pure man coverage with no deep safety. Every coverage defender is locked on a receiver, which frees extra players to blitz. It is the most aggressive call in football: if pressure gets home, great; if a receiver beats his man, there is nobody behind to help. In Madden, Cover 0 blitzes are high-risk, high-reward calls best used when you expect a quick pass or need a big play.
Cover 1
Man coverage for the defensive backs plus one deep safety, usually the free safety, who reacts to the play. It keeps much of Cover 0’s aggressiveness while adding a safety net over the top. Cover 1 pairs well with a blitz or a spy on a mobile quarterback.
Cover 2
Two safeties each take half of the deep field, while cornerbacks play shorter areas with responsibilities against runs and short passes. Cover 2 is a “bend-but-don’t-break” coverage. Its classic weaknesses are the seam between the two safeties and the deep middle, along with having fewer defenders near the line against the run. Cover 2 Man combines the two-deep shell with man coverage underneath.
Cover 3
Two cornerbacks and the free safety each cover a deep third of the field, while the strong safety plays closer to the line like an extra linebacker. Cover 3 is strong against the run and protects deep passes well, but it is vulnerable to quick throws toward the sideline and in the flats. It is also relatively easy for quarterbacks to identify.
Cover 4 (Quarters)
Four defenders each take a deep quarter of the field. It is excellent against deep passes and is a classic prevent call late in a half. The trade-off is space underneath, where short and intermediate routes can find room.
Cover 6
A combination coverage: quarters on one side of the field and Cover 2 on the other. It lets you play different rules toward the wide side and the short side of the field.
Tampa 2
A variation of Cover 2 in which the middle linebacker drops deep into the middle of the field after reading pass, creating a look that resembles Cover 3. The scheme was popularized by the Tampa Bay Buccaneers under Tony Dungy and Monte Kiffin, with roots in 1970s Pittsburgh Steelers defenses. It patches Cover 2’s deep middle weakness but requires a fast, intelligent middle linebacker. It can be attacked by seam routes, runs up the middle and mismatches against the linebacker in coverage.
Reading the Play Art: Zone Colors
Madden’s play-call screen shows each defender’s assignment. Zone assignments are shown as colored shapes, and in recent editions the color conventions have stayed fairly consistent:
| Color | Zone type | What it does |
|---|---|---|
| Dark blue | Deep zone | Protects against deep passes; safeties and corners in Cover 2, 3 and 4 |
| Yellow | Hook zone | Underneath zone over the middle, usually linebackers |
| Purple | Curl-flat (sometimes called a buzz zone) | Covers the curl area first, then the flat |
| Light blue | Flat zone | Shallow zone toward the sideline |
A useful rule of thumb: the deeper and darker the color, the deeper the zone; lighter shades play closer to the line. Man assignments are shown as lines connecting a defender to a receiver, and blitz paths point toward the backfield. Because exact colors and labels can change between editions, use the in-game legend to confirm.
Modern Madden zones are also more dynamic than the shapes suggest. Some coverages use match rules, where defenders pass receivers off or switch to man-like coverage depending on route combinations. That is why a zone may not behave exactly like its drawing.
Blitzes: When and Why
A blitz sends extra defenders after the quarterback, beyond the standard four-man rush. Blitzing is about trading coverage for pressure.
- Blitz with man coverage (Cover 0 or Cover 1) when you expect a quick throw or want to force a fast decision.
- Use zone blitzes to bring pressure from unexpected places while dropping other players into coverage.
- Avoid blitzing too often. Repeated blitzes leave you short in coverage, and opponents learn to beat them with quick routes and hot routes.
In Cover 3, the strong safety can move toward the line with little change to coverage, which makes it a natural base for adding a rusher. In Cover 2, pressure usually has to come from the front four, because failed blitzes open larger holes in the zones.
Coverage Adjustments
Madden lets you adjust coverages before the snap without changing the play. These adjustments are one of the most powerful tools for a defensive player.
Shading
Shading tells your defensive backs to favor a certain area. In recent editions, you open coverage adjustments and use the right stick to shade coverage underneath, over the top, inside or outside. Shading underneath helps against short routes such as slants and drags; shading over the top protects against deep balls. Some guides note that shading can also take your defense out of match coverage rules, which affects how zones behave.
Zone drops
Madden allows you to set the depth of certain zones, such as hook zones and flats, through defensive adjustments. Shallow hook zones help against drags and short crossing routes; deeper hooks protect intermediate routes over the middle. Changing a flat zone to a “hard flat” keeps it near the line, while a curl-flat plays deeper before moving outside.
Other common adjustments
- Press or play off to choose how close cornerbacks line up.
- Show blitz to disguise your coverage by moving defenders toward the line.
- Individual assignments such as assigning a specific defender to a zone, to a receiver or to spy the quarterback.
If you are still getting comfortable with the basics of the play-call screen, start with our Madden beginner’s guide before experimenting with adjustments.
User-Controlling a Defender
Most experienced Madden players control a defender after the snap, often a linebacker or safety in the middle of the field. This lets you cover the gap that your coverage leaves open. For example, in Cover 2, controlling a defender in the deep middle helps protect the seam between the safeties. In Cover 3, you might control a linebacker to cover the short middle. The key is to know where your coverage is weak and position yourself there.
Madden’s defensive assists can help while you learn. Settings such as ball-hawk and heat-seeker assist and switch assist help user-controlled defenders stay in plays; our guide to difficulty levels and sliders covers how game options like these work.
Reading What the Offense Is Doing
Good coverage calls start with paying attention to the offense. A few general football clues are worth watching in Madden:
- Formation and personnel. Several receivers spread wide suggest a passing play, while extra tight ends and a fullback suggest a run. Match your personnel accordingly.
- Trips and overloads. Three receivers on one side can overwhelm zones on that side. Some coverages adjust to this automatically, but shading or assigning a defender can help.
- Tendencies. If an opponent repeatedly attacks one area, such as the flats or the deep middle, call coverages that take it away and use your user defender to clog it.
- Down and distance. On third and long, offenses need yardage past the sticks; deeper drops protect that area.
Matching Coverage to Situation
| Situation | Common approach |
|---|---|
| Short yardage | Man coverage with extra defenders near the line |
| Third and long | Zone with deeper drops, or a well-timed blitz |
| Protecting a lead late | Cover 4 or other deep zones to prevent big plays |
| Mobile quarterback | Assign a spy, or user-control a defender to contain |
| Opponent spamming deep routes | Shade over the top or use more deep zones |
Common Mistakes
- Calling the same play repeatedly. Human opponents adapt quickly.
- Blitzing every down. It leaves you exposed.
- Ignoring the play art. Know where your zones are before the snap.
- Chasing the ball with your user defender. Stay disciplined and cover your area.
- Forgetting adjustments. Shading and zone drops fix many problems without a new call.
Coverage concepts like these have been part of Madden’s identity since its early days, when John Madden insisted the game reflect real football. Our Madden series history explains how that philosophy shaped the franchise.